
When you start working on a documentation project in GitHub, it’s best practice to create a new branch before you make changes. This keeps your work separate from the published version, prevents you from overwriting other people’s updates, and lets you experiment without risk.
In this post, I’ll explain what a branch is, when to create one, and how to do it in both Visual Studio Code and the command line.
What is a branch?
A branch is like an alternate timeline for your documentation. It lets you work on making updates and adding content without affecting:
The published version of your docs
Any work your teammates are doing in other branches.
Example:
Let’s say your project publishes approved documentation from the main branch. This is the version your customers will see. You need to make some updates, so at 10:00 on August 14th, you create a new branch.
You now have:
Mainbranch with all its history tracked by Git. This is the default branch in most GitHub projects.
Newbranch which is identical to the main branch up to 10:00 on August 14th.
From that moment on, any changes you make in the new branch do not affect the content in main. You can freely add and edit content without affecting the main branch.
When you have finished, you have your updates reviewed and approved. Your content is ready to publish, so you push your changes from your branch into the main branch, where they will be included in the next publication. Combining two different branches in this way is called merging and that’s something I’ll cover in a later post.
When should you create a new branch?
You should create a new branch:
Each time you plan to create new content or make changes to existing content.
To keep your work-in-progress separate from the main branch, which could be published at any time.
To reduce confusion in a team of writers. Generally, you work in your own branch until the content is finished, reviewed, and approved. Then you merge your branch back into main so it can be published.
Before you branch … check out and pull
Before you branch, you should:
Checkout the branch you want to branch from.
This tells Git which branch, files, and history you want to work with. The correct technical terminology is “it switches your working directory” to the chosen branch.Pull the latest changes from the remote repo. This updates the branch you have checked out so that it is up-to-date.
If you don’t checkout and pull, you could end up creating a new branch that is based on an old commit. This could cause unwanted conflicts later.
Checkout and pull (in Visual Studio Code)
To do a checkout and pull in Visual Studio Code:
-
Select the branch name and then select the branch you want to switch to.

You have now switched to your chosen branch.
-
Select the Source Control icon in the sidebar.
-
Select the context menu at the top.
-
Select Pull.
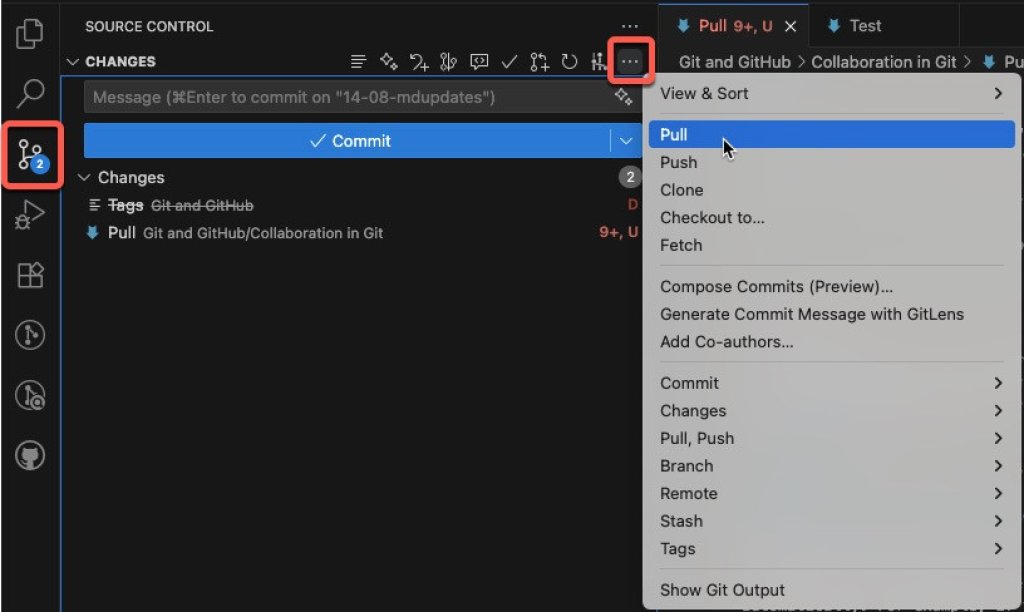
If the pull is successful, you have updated your local copy with all the latest changes (commits), such as changes made by your colleagues. Doing a pull before you create a branch or update content is a good idea as it helps to limit merge conflicts later. You are now ready to create a new branch.
If the pull is unsuccessful, it is likely because you are trying to fetch from a location that does not match your repo. To fix it, you need to repoint origin to the correct place. For that, I recommend you use ChatGPT or a similar AI service to guide you through fixing the problem.
Checkout and pull using terminal or command prompt
Alternatively, you can use terminal and enter:
git checkout branch-nameWhere branch-name is the name of the branch you want to use, for example:
git checkout mainWhen you have checked out the branch, enter the following to get the latest information:
git pullIf the pull is successful, you have updated your local copy with all the latest changes (commits), such as changes made by your colleagues. Doing a pull before you create a branch or update content is a good idea as it helps to limit merge conflicts later. You are now ready to create a new branch.
If the pull is unsuccessful, it is likely because you are trying to fetch from a location that does not match your repo. To fix it, you need to repoint origin to the correct place. For that, I recommend you use ChatGPT or a similar AI service to guide you through fixing the problem.
Create a branch in VS Code
To create a branch in VS Code:
-
Open your project in VS Code. Your project is your local repo.
-
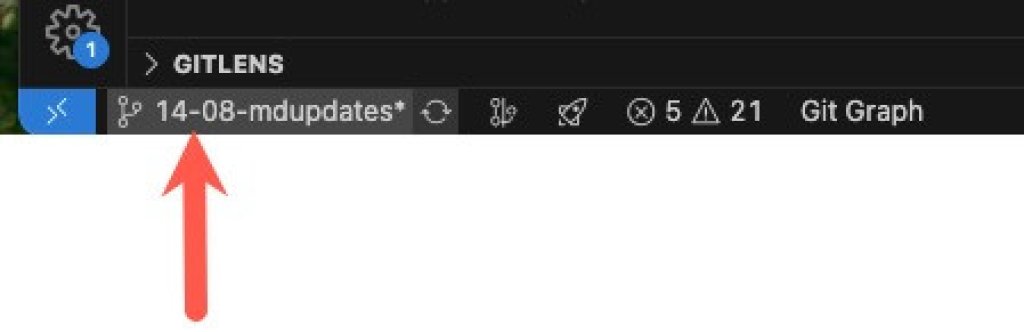
Look in the footer in the bottom-left corner. It shows the name of the branch you are currently working on, for example,
main.
If this is not the branch you want to base your new branch on, you’ll need to switch to the appropriate branch. To do that, select the branch name that’s shown and then select the appropriate branch name from the list at the top.
-
At the bottom, select the branch name.
-
At the top, select Create new branch.

-
Enter a meaningful name for your new branch and press Enter.
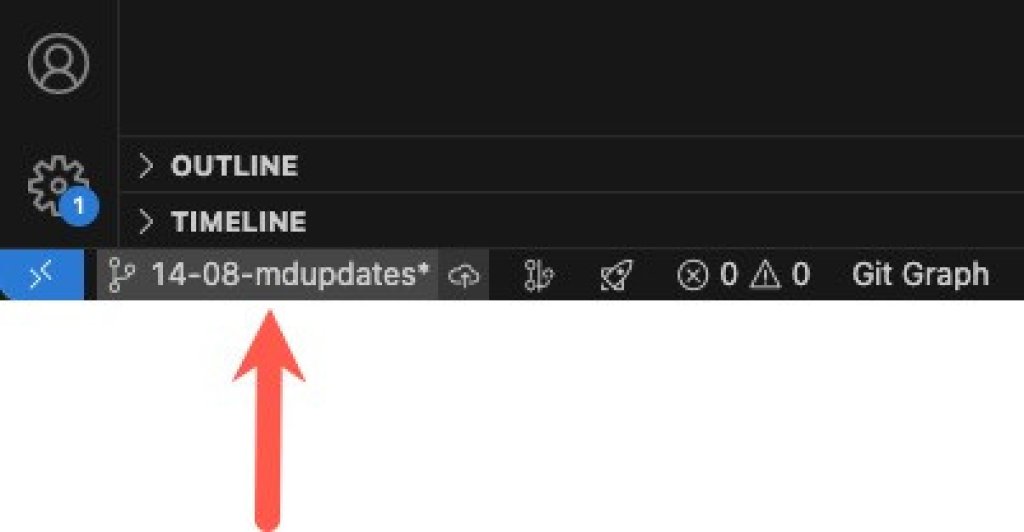
You have now created a new branch and it is loaded into VS Code automatically. If you look at the branch name in the bottom-left corner, you will see that it shows your new branch.
Create a branch using terminal or command prompt
If you are not using VS Code:
Open your terminal or command prompt.
Navigate to your local repo folder.
Enter the following command to create a new branch and switch your working directory to it:
git checkout -b branch-name
Note: Replace branch-name with the name you want for your new branch.
That’s all for this post. In the next one, I’ll look at creating Markdown content in VS Code.
